How To Tie A Cleat Hitch Knot
Published by Chris Riley in Nautical Knots Last updated on July 12, 2022


When it comes to mooring your boat, the Cleat Hitch Knot is the best knot for the job. It’s strong, secure, and easy to perform. It’s easy to untie too!
While it’s mainly used for securing a mooring line, the Cleat Hitch can be used for a wide range of tasks. For example, it can be used for cleating a sheet, or for towing another boat (or being towed). It also looks good too, and even non-boaters can enjoy learning how to tie this useful hitch.
In this guide, we will show you how to tie this knot and also give you some handy additional information to make sure you’re using the right knot for the task at hand.
What Is A Cleat?
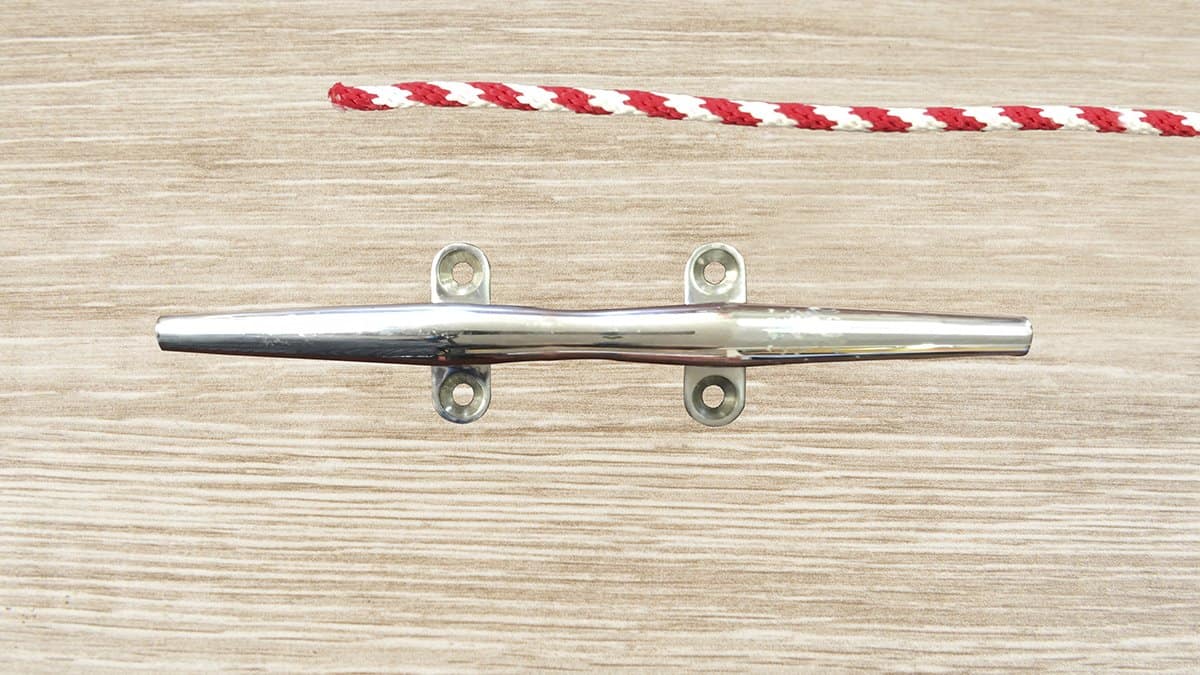
Before we get into the business of learning how to tie a cleat hitch knot, we should quickly explain what a cleat is. If you’ve ever been around boats, you will have seen a cleat before: it’s a t-shaped fitting often found on a boat’s sides and deck. A cleat can be made of different metals, heavy-duty plastic, or wood. These little devices are used for attaching ropes and lines.
The Cleat Hitch is a special knot that is used in partnership with a cleat to ensure a safe and secure mooring line or tie-down in any situation. Since mooring is a crucial part of boating, the Cleat Hitch Knot is an essential knot to learn. And while every good sailor should know it, you’d be surprised at just how many boaters get it wrong.
We’re under the impression that no two boaters on the same dock will teach you how to tie this knot the same way. Everyone has a slight variation of this classic knot, and everyone’s way is right according to them! So, without further ado, here’s how you do it properly.
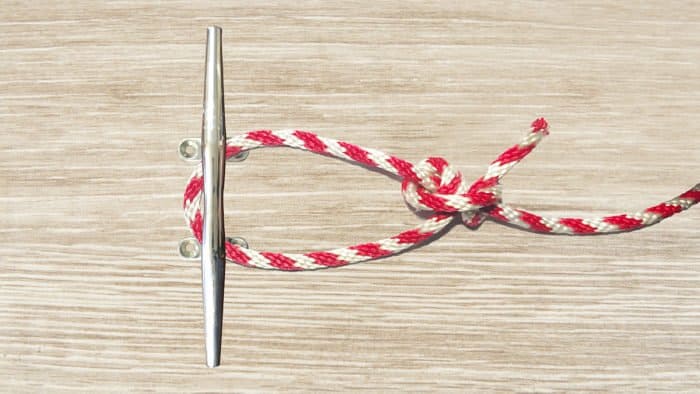
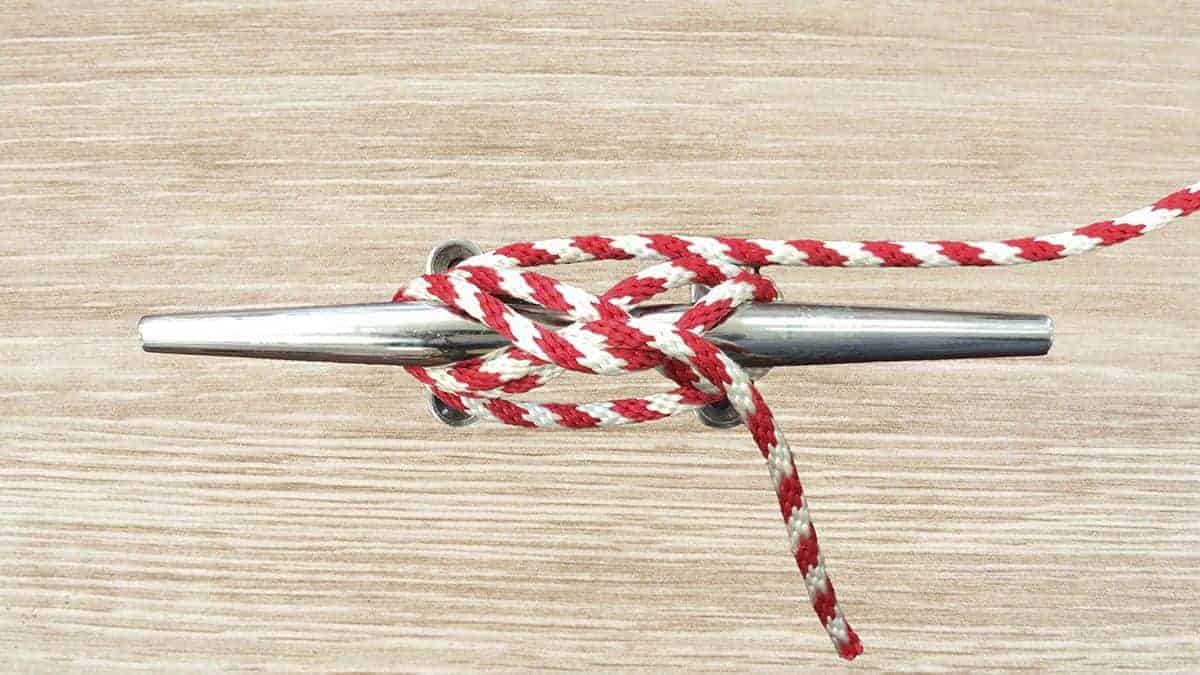
How To Tie A Cleat Hitch Knot
Grab a length of rope and something to act as a cleat and master your first ever Cleat Hitch Knot!
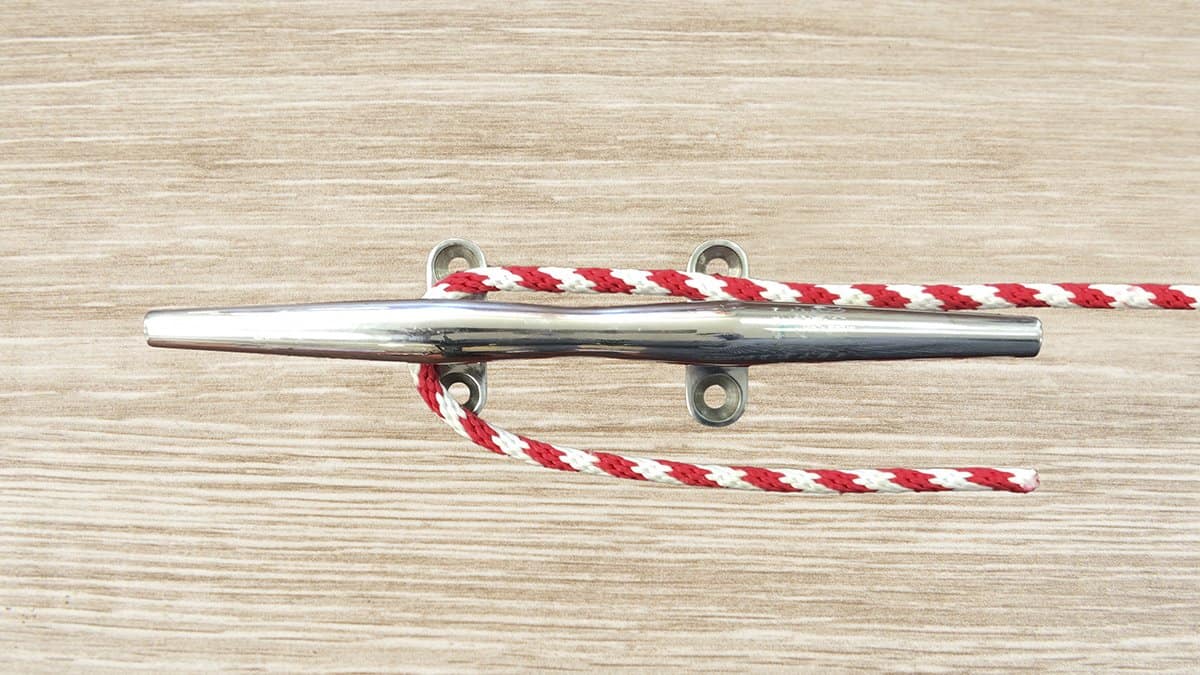
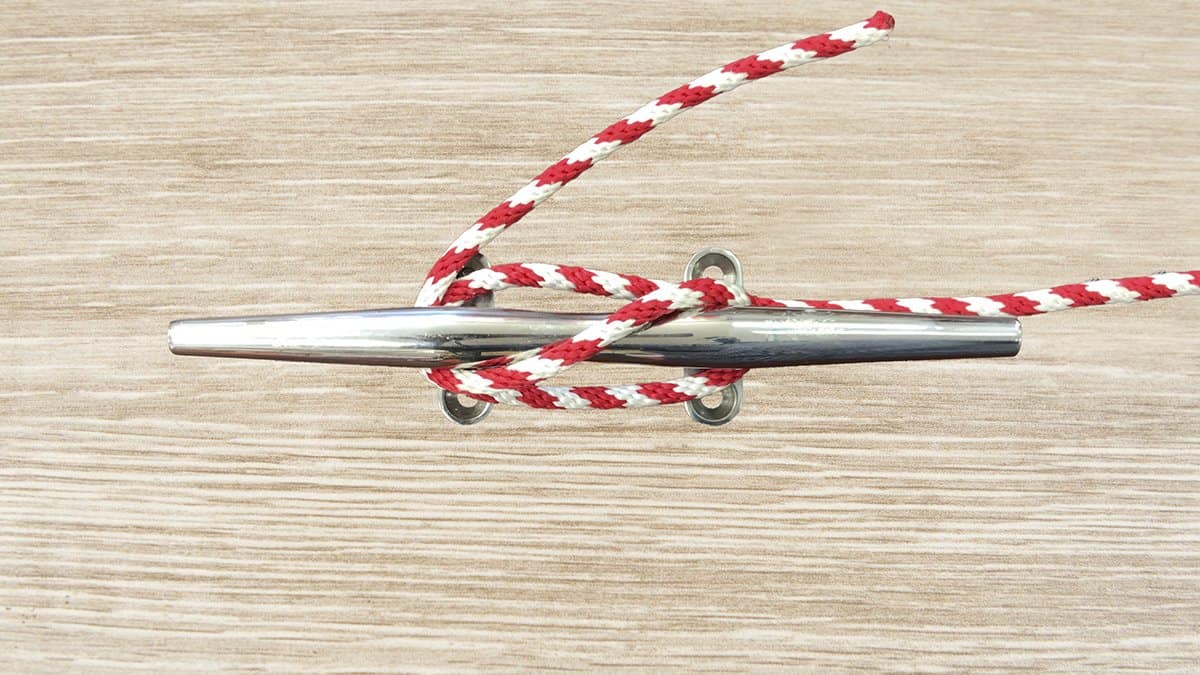
Step 1: Use your rope to take a turn around the cleat. Now pull the rope over the middle of the cleat.
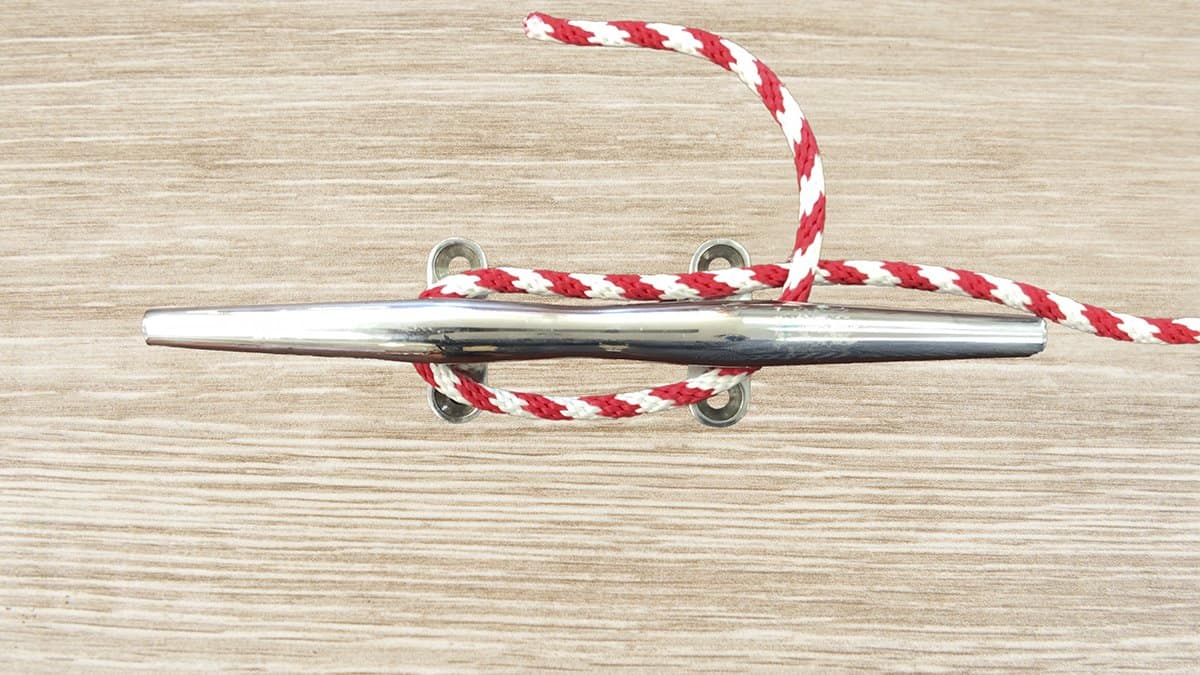
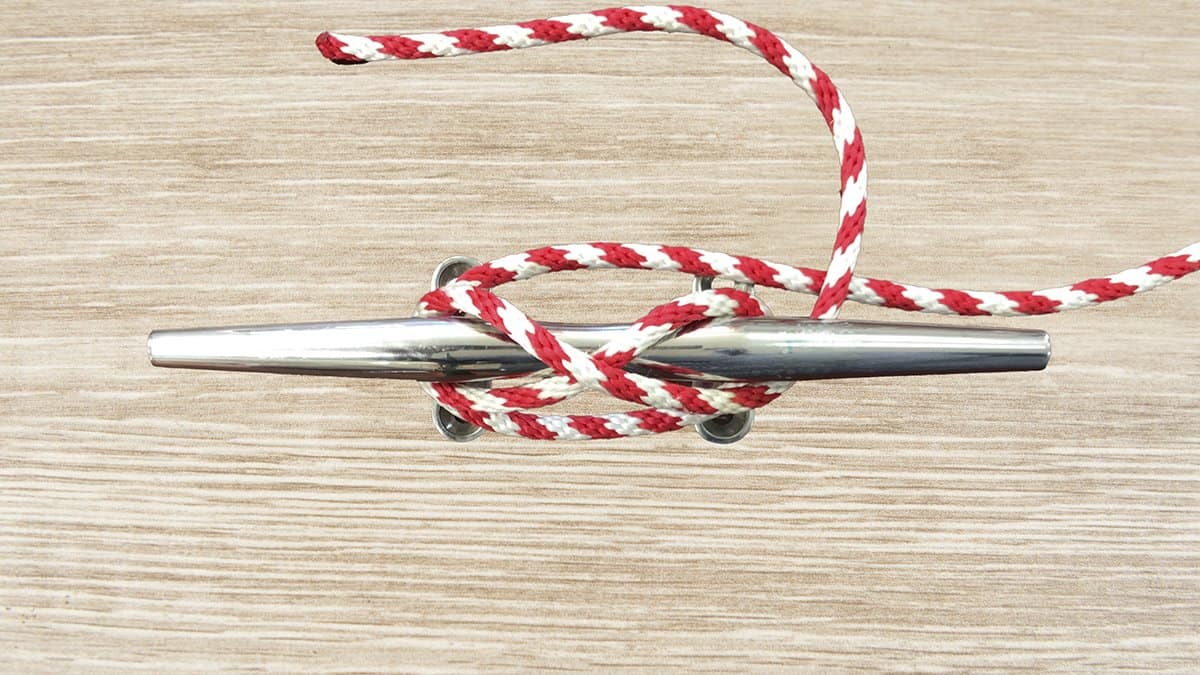
Step 2: Pull the rope under the ear of the cleat and start a figure eight across the top of the opposite ear.
Step 3: Check to make sure your figure eight is correct before continuing. This is where most mistakes happen.
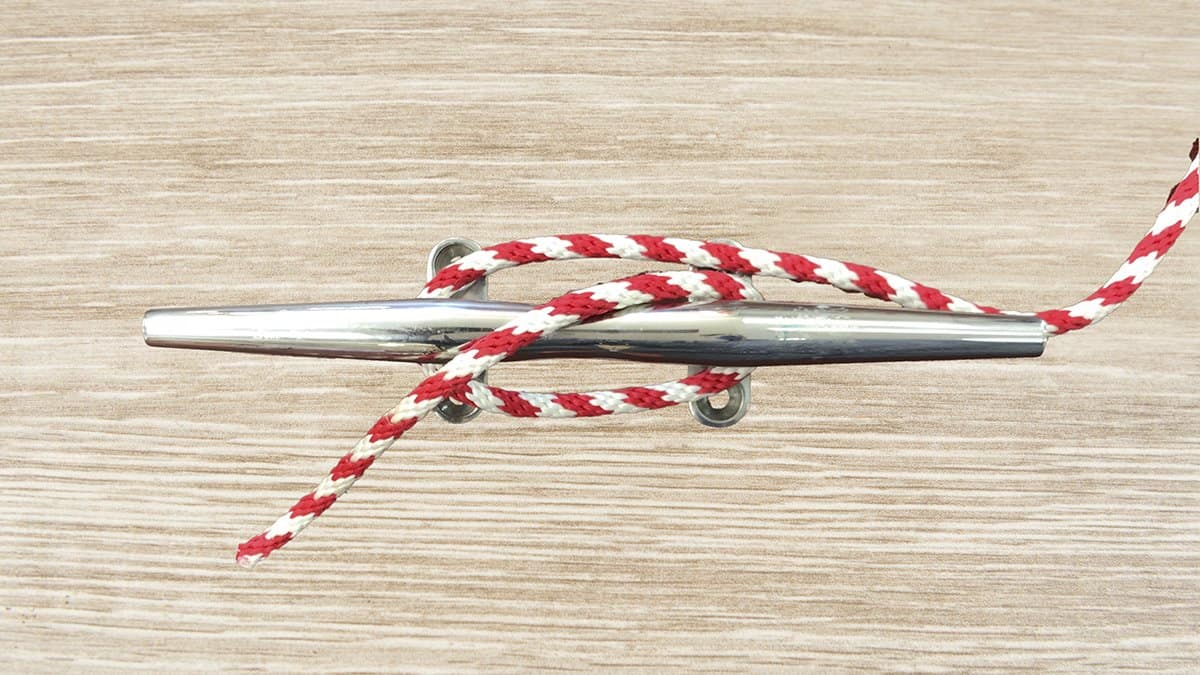
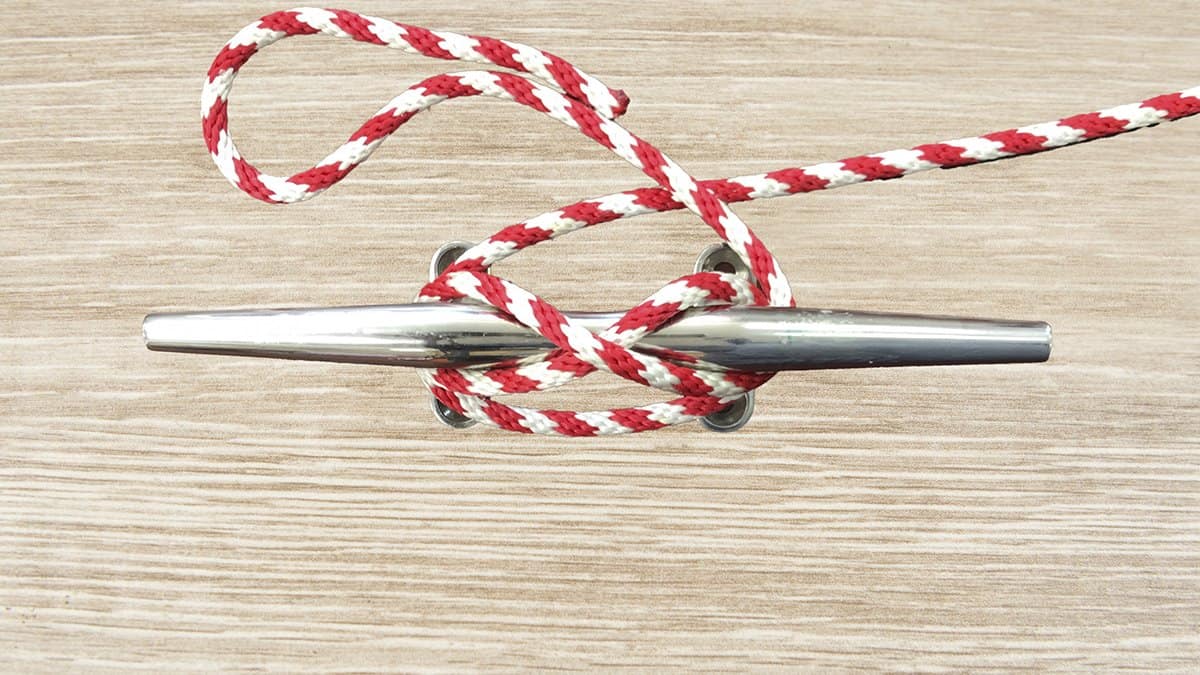
Step 4: Make an underhand loop and place it over one of the cleat’s ears. This should pin the free end of your rope under the last line wrap.
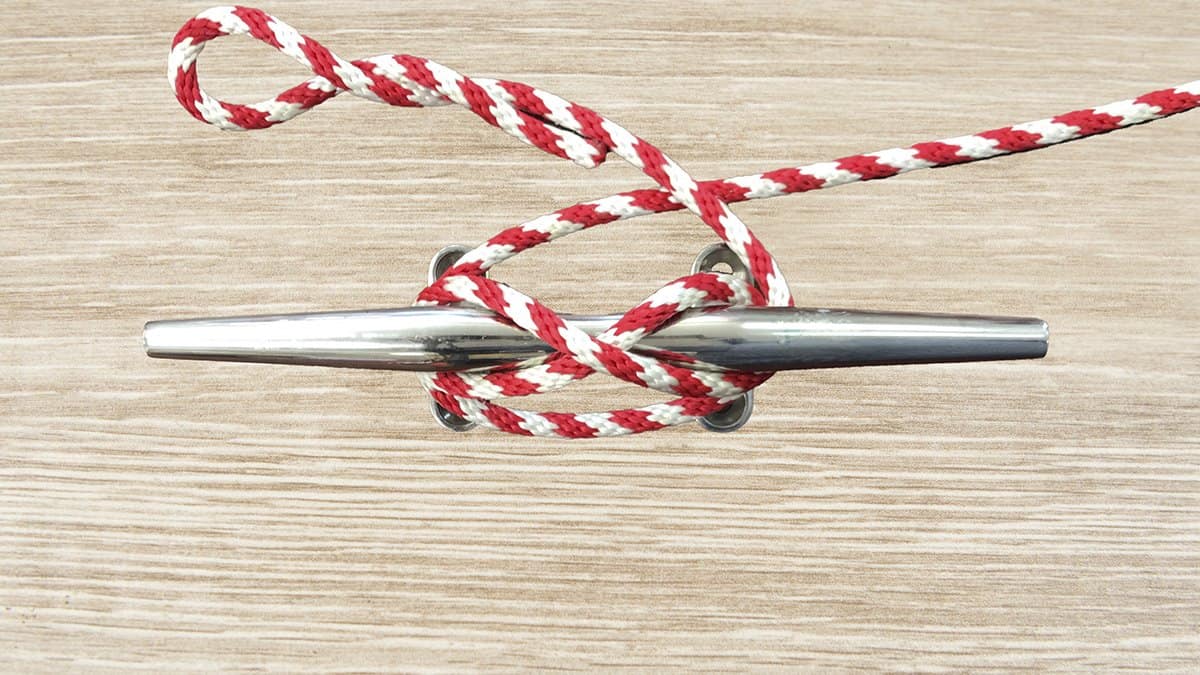
Step 5: Pull the free end tightly. This final half hitch is the last step, and you’ve successfully performed a tidy Cleat Hitch Knot.
Other Things To Consider
The secret to becoming a knot-tying expert is knowing when and where to use a knot, and what modifications you may need to make depending on the situation. The Cleat Hitch is a fairly universal knot, but there may be times when it’s not the best choice, or it may need a bit of extra work to make it as secure as it can be. Here are a few bonus tips on using the Cleat Hitch Knot.
When To Use A Cleat Hitch Knot
When should you use a Cleat Hitch? If there’s a cleat available, then the Cleat Hitch is the best knot for the job. If there’s no cleat nearby, then you’re best off using a different knot. It’s a simple rule, but it’s an effective one. Every boater will agree with that logic. However, there are plenty of Cleat Hitch-related rules that sailors can argue about…
How Many Turns To Use
In the Ashley Book Of Knots, the Cleat Hitch was displayed and explained having very few turns. In our guide, we’ve followed suit and you’ll see a single crossover before the final crossover and half hitch. Ashley’s knots were described at a time when thicker, heavier rope was popular.
Today, we use thinner, stronger, more elastic, rope. This means we can add additional crossover turns to make a securer knot. For heavy loads, you can use more turns. For lighter loads, you can stick with fewer. Although, every boater has an opinion on this…
Suitable Alternatives
Suitable alternatives to this knot include the Barrel Hitch, the Munter Hitch, the Rolling Bend, or in some cases, the Timber Hitch. However, if there’s a cleat available to use, then we would always recommend a properly executed Cleat Hitch Knot over any of these others.
Categories: Nautical Knots