How to Change the Oil in Your Boat
Published by Chris Riley in nauticalknowhow Last updated on May 31, 2021
Just like getting the oil changed in your car, you need to change engine oil in your boat. The difference here is that it can be a much messier job. Many boat owners dread oil changes in their boat. It doesn’t have to be as hard as it seems, though. It’s definitely something you don’t want to avoid doing either. Changing the oil in your boat is one of the most important things you can do. This maintains the engine and keeps it performing optimally.
How Often Do You Need to Change Your Boat’s Oil?
There is no hard-and-fast rule for oil changes in boats. Just like cars, it can vary from one boat to another. Most manufacturers recommend you change your boat’s oil every 50 to 100 hours of operation. Sometimes this is translated to once every year, whichever comes first. The best way to know for sure is to check your owner’s manual. If you don’t have one, you can probably Google your specific boat to find out. There is a routine schedule of maintenance for every boat.
One thing to keep in mind is whether or not you have a new boat engine. There is a break-in phase for new boat engines. During this phase it is recommended by many experts to make an oil change after only 20 hours of operation. That’s just for the first oil change, however. After that, every 100 hours or so is the standard.
One other thing to consider is the type of engine you’re running. Diesel engines are harder on oil than gasoline engines. For that reason you should be doing an oil change on a diesel fuel engine more often. Closer to that 50 hour mark rather than the 100 hours.
How Much Does it Cost to Change the Oil in a Boat?
If your boat has a single-engine and you opt to change the engine oil yourself, it should cost you about $50 to $75. This depends on the kind of oil you need and also the oil filter. If you take your boat to a professional, they may charge you upwards of $300 to get your oil changed. For that reason, it may be in your best interest to try doing the job yourself.
Changing Your Boat’s Oil

There are a few steps you need to follow to change the oil in your boat. Follow all of these steps to make the process as easy as possible.
-
- Get your boat’s engine up to temperature. Warm oil flows more easily and also holds more grit and grime. That will make it easier to clean out.
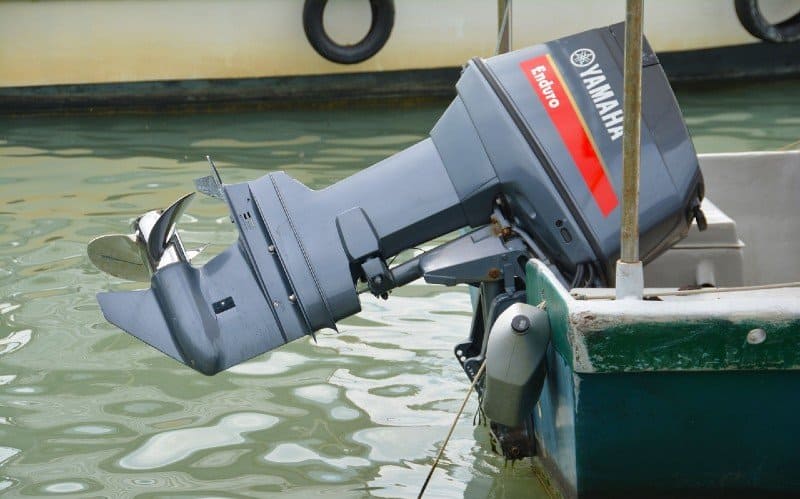
- Use an extractor pump to remove oil from a 4-stroke outboard motor. You can connect it through the dipstick tube. Four-stroke engines do have a drain plug, but they can be very messy. An extractor pump is a much faster and cleaner method.
- You can also use something called a Tilt n Drain oil drain kit. These cost about $18. These simple kits include a hose and a fitting. It fits over your drain spout and makes removing the oil much easier.
- Make sure you have a catch oil pan and some pads to absorb the oil beneath the engine and your oil filter.
- You should also have a socket set with an extension bar, a funnel, and a filter wrench.
Steps for Changing Your Boat’s Motor Oil With a Tilt n Drain Kit:
- Put your engine in the upright position. If it’s not in the upright position, then you’re going to end up having oil spilling everywhere.
- Place the drain pan beneath the propeller.
- Remove the hex nut that is inside the drain spout on the engine.
- Get the drain hose over the top of the engine drain spout. Make sure the other end is over the drain pan.
- Begin to slowly lower your engine into the vertical position. Gravity will do the rest and allow the oil to drain out.
- Once the oil starts flowing you can return the engine to the tilted position and take the drain hose out.
- Get the oil drain plug back in the engine and tighten it securely.
- Return the engine to the vertical position. You’re now ready to add the new oil.
- Remove the cover from the top of your engine.
- At this point you’ll need to use your oil filter wrench, or maybe just the socket wrench will do. It really depends on the type of engine you have. You can now remove the old oil filter and replace it with your new filter. Make sure it’s tight and securely into place.
- Take off your oil cap and insert the funnel into the hole.
- Make sure you know the volume of oil that the reservoir takes and begin to pour in your new motor oil. Always do this slowly and carefully.
- Once you’ve added enough oil, you can then remove the funnel and reseal the cap.
- Re-secure the cover on top of the engine.
- Put the funnel in your empty bottles of oil and empty the used motor oil from the pan back into the motor oil bottles. These can now be disposed of. You should take them to a local auto shop so they can be safely dealt with. Don’t throw old motor oil in the garbage or down the drain.
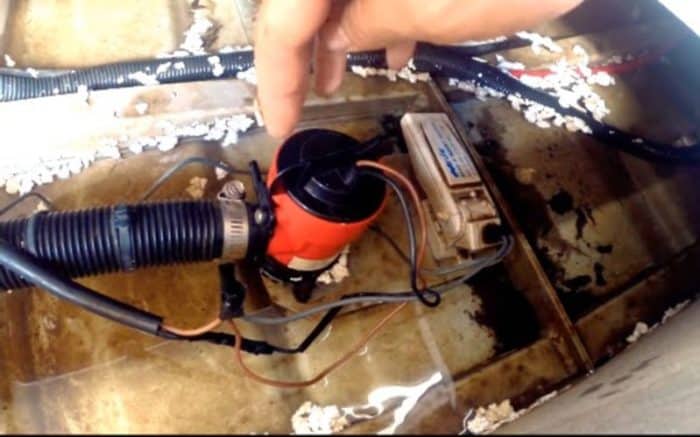
Steps for Changing Oil With an Extractor Pump
Many boat owners prefer an extractor pump to change the oil. Getting to the bottom of an engine is not an easy task all the time. Boat engine makers have a tendency to put the oil drain plug in the hardest to reach space as possible. Extractor pumps make this job easier to handle. Extractor pumps work like sump pumps. You can use either a manual pump or an electric pump. Manual pumps take more work, but you can use them anywhere. As long as you have access to the dipstick tube changing your boat oil should work out fine.
- Get your engine warmed up first.
- Place some absorbent pad under the engine to catch any spills and drips.
- Remove the oil fill cap. You won’t be using this for the pump, but it helps equalize pressure and makes pumping easier.
- Insert the tube from your pump into the dipstick tube.
- Feed the tube in until you feel it hitting the bottom of the reservoir.
- At this point, you can start pumping out the oil.
- After several minutes you may hear it to start gurgling like you’re reaching the bottom. Now you can move the hose around. Continue pumping to make sure you’re getting all the oil at the very bottom.
- Once the oil is drained you can remove the oil filter. Some boat owners have found that putting an inside out plastic bag over their hand to do this job makes it easier. As you unscrew the filter you can pull the bag up around it to catch any runoff and then seal the bag.
- Double check that the oil filter gasket has been removed as well.
- Apply a tiny amount of oil to the new oil filter gasket. You can lightly run your finger around it. This will ensure a better seal.
- Install the new filter.
- Put the funnel in the oil tank and begin to slowly add new oil. Remember to check exactly how much your tank holds. Also remember that the pump it’s not able to get every drop out. That means you will still have a small amount in the tank to compensate for.
- Reseal the oil fill cap.
- You can now restart your engine and let it get up to operating temperature. This will allow you to look for any leaks.
Changing the oil in boat engines doesn’t have to be the difficult process. With a little bit of preparation, you should have no problem with changing engine oil in your boat. A few supplies and a little bit of time are all you need. This can save you a lot of money. It also gives you a better understanding of how your boat operates.
Categories: nauticalknowhow